WebOS Signage Support
Supported LG Operating Systems: WebOS4.0 Signage WebOS4.1 Signage or higher
WebOS smart TV not supported
Installing the Digital Signage App
To Install the digital signage app, choose one of the following methods:
- via the Internet (preferred)
- or using a USB drive.
Set time and date
Important: If you have not set the time & date the app will not be able to communicate with the cloud service
Go to Settings
- Select General
- Select Time & Date
- Select Set Automatically and ensure the time is set up correctly
- Navigate to Timezone
- Select the correct Continent, Country/Territory, and City
Installing the Digital Signage View App via the Internet
Note that an internet connection is required so make sure that the previous step has been successfully configured.
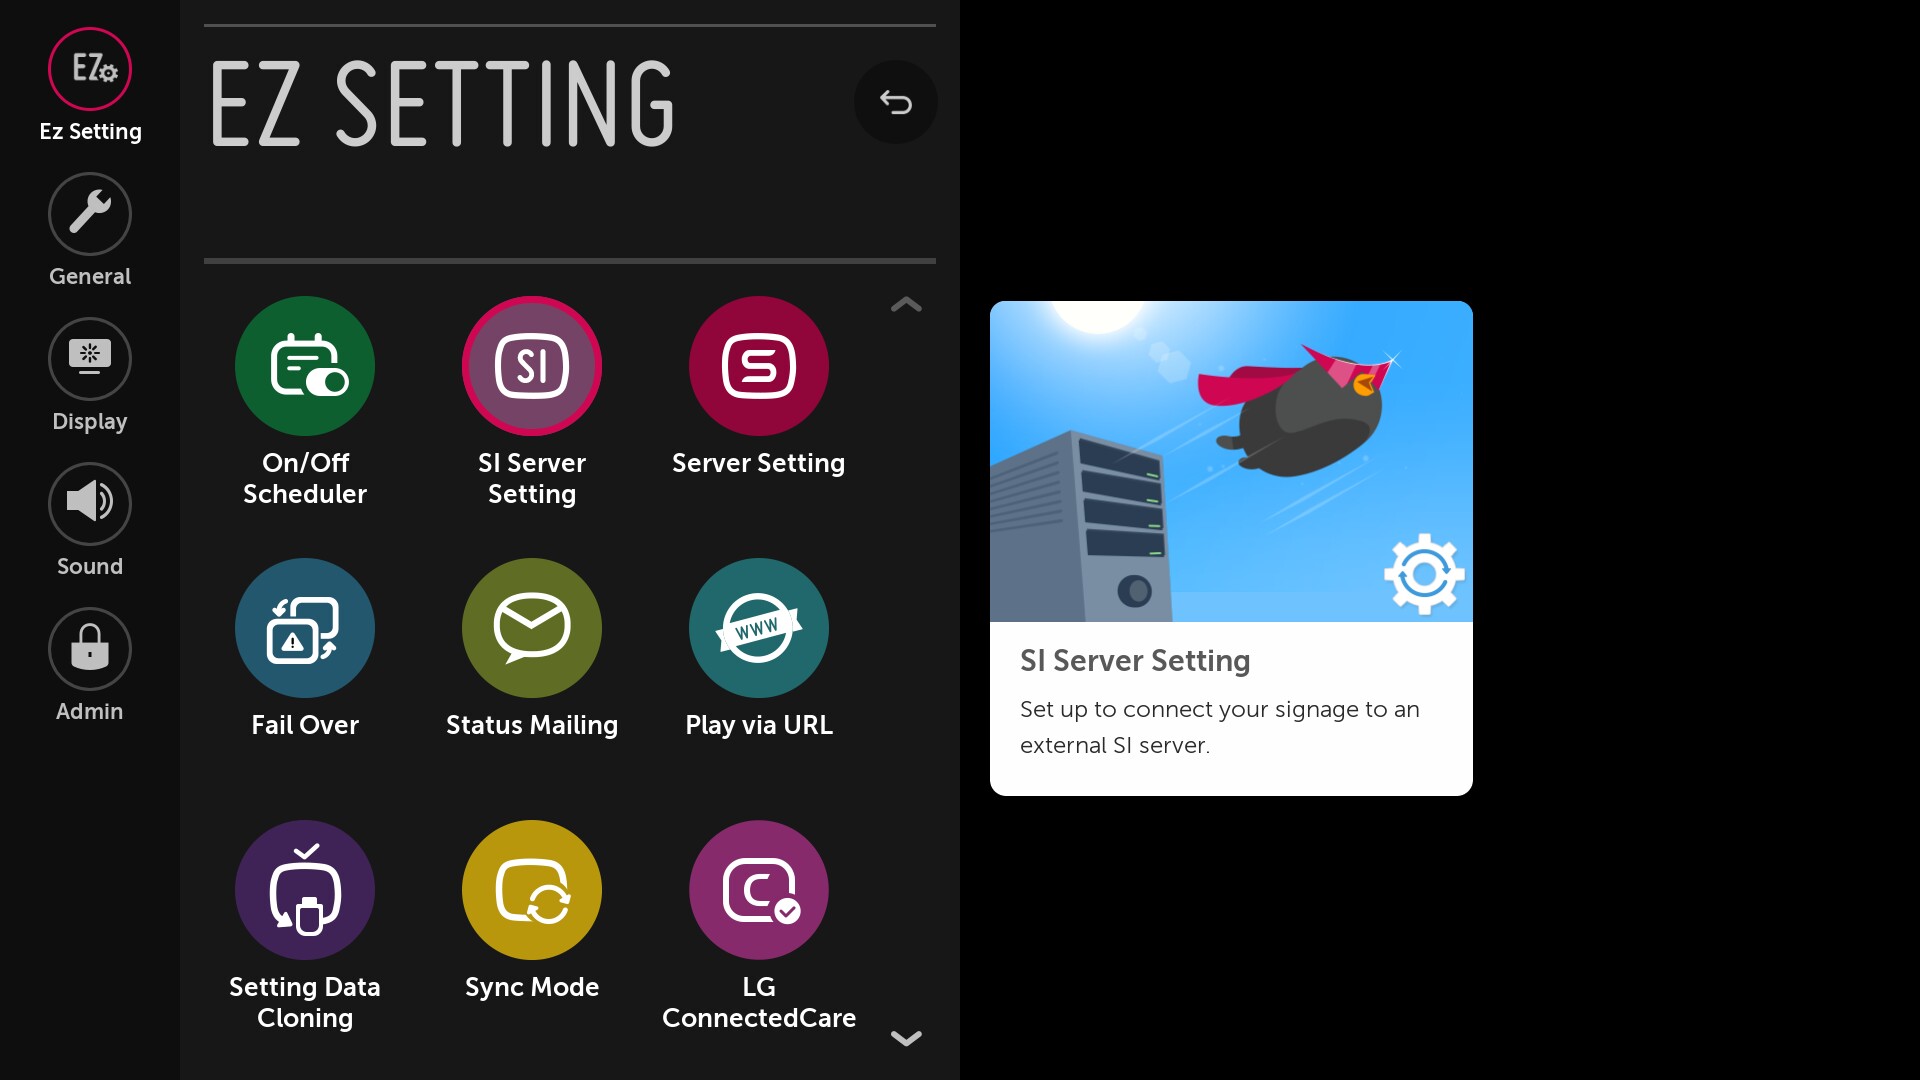
- Open Settings using the remote (press the [settings] button or the gear icon button)
- Go to EZ Setting
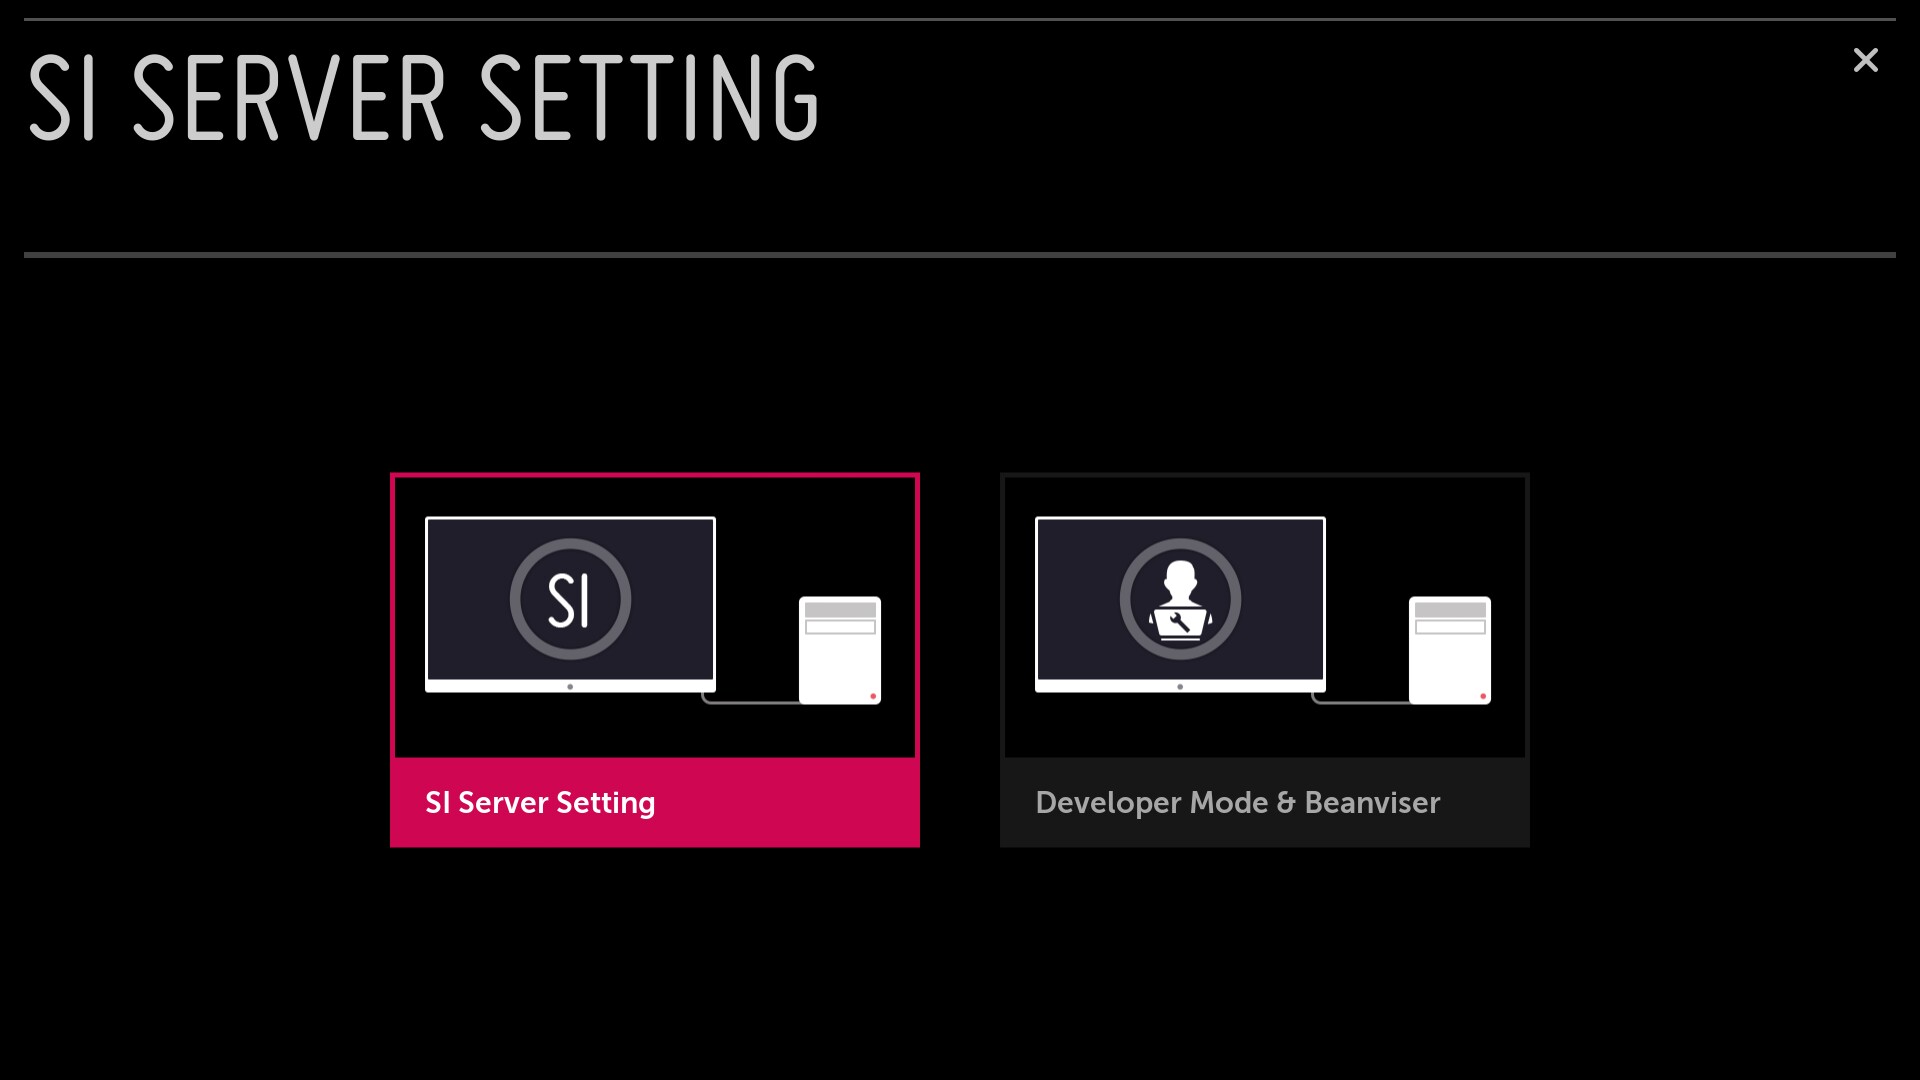
- Go to SI Server Setting and continue

Select SI Server Setting

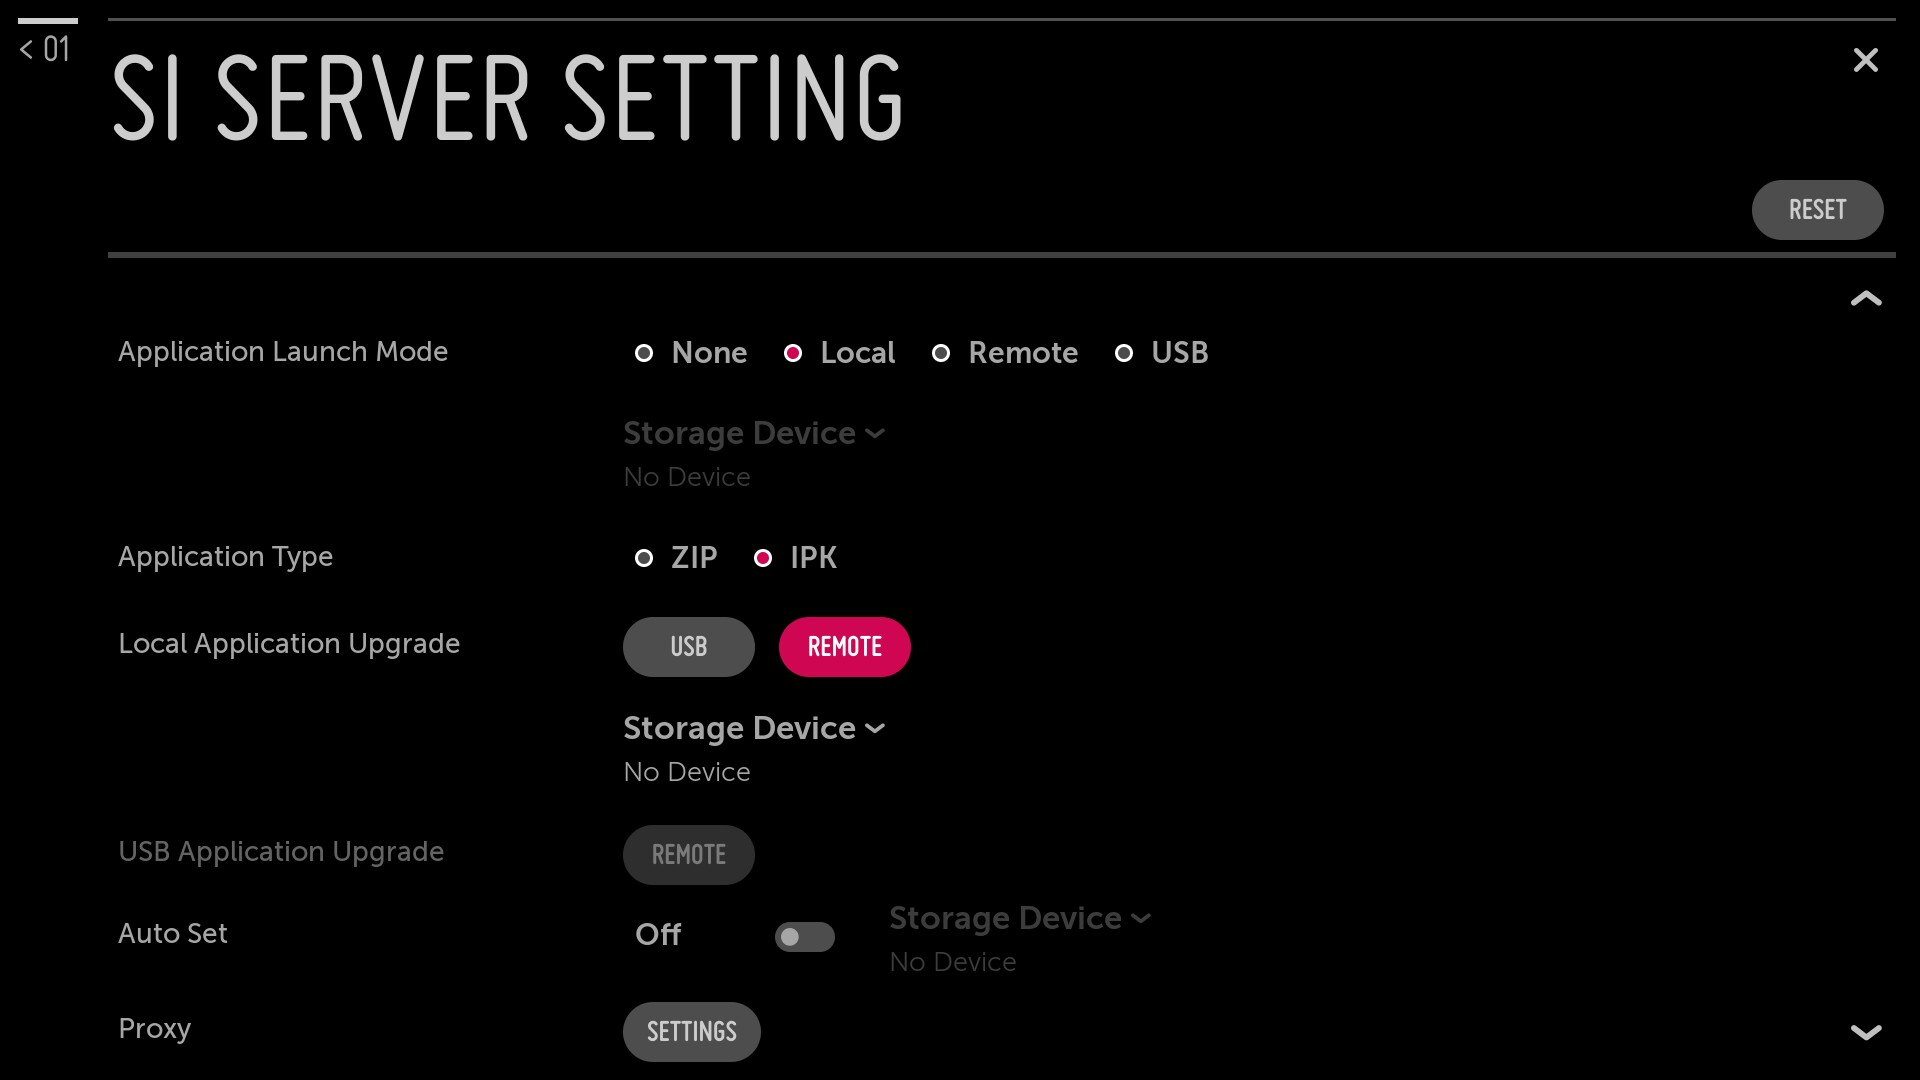
In these settings configure the following in this order:
Fully qualified domain name: enabled
Address URL: https://appds.io/lgw
Application Launch Mode: local
Local Application type: IPK
Auto Set: “Off” (this setting is not always visible)
For the final step navigate to Local Application Upgrade and select REMOTE. Press the OK button to confirm. In the top right corner, a pop-up displaying “Start Application Upgrade’ will show for a second.
When this message disappears, TURN OFF the device using the remote. Then, after 10 seconds, TURN ON the device. The Digital Signage View app will now install and launch.

Installing the Digital Signage App via a USB drive
Download the latest version of the Digital Signage from https://download.cloud-digitalsignage.com/brands/com.lg.app.signage.ipk
Rename the downloaded .ipk file to com.lg.app.signage.ipk – this is important!
Format the USB drive to FAT32
Create a folder named application in the root of the USB drive (note: all lower case)
Place the renamed com.lg.app.signage.ipk file inside the application folder
Put the USB drive in the WebOS device
Then
- Power on the device
- Press the settings button on the remote (the [settings] or the gear icon button)
- Go to SI Server Setting and continue
- Select SI Server Setting.
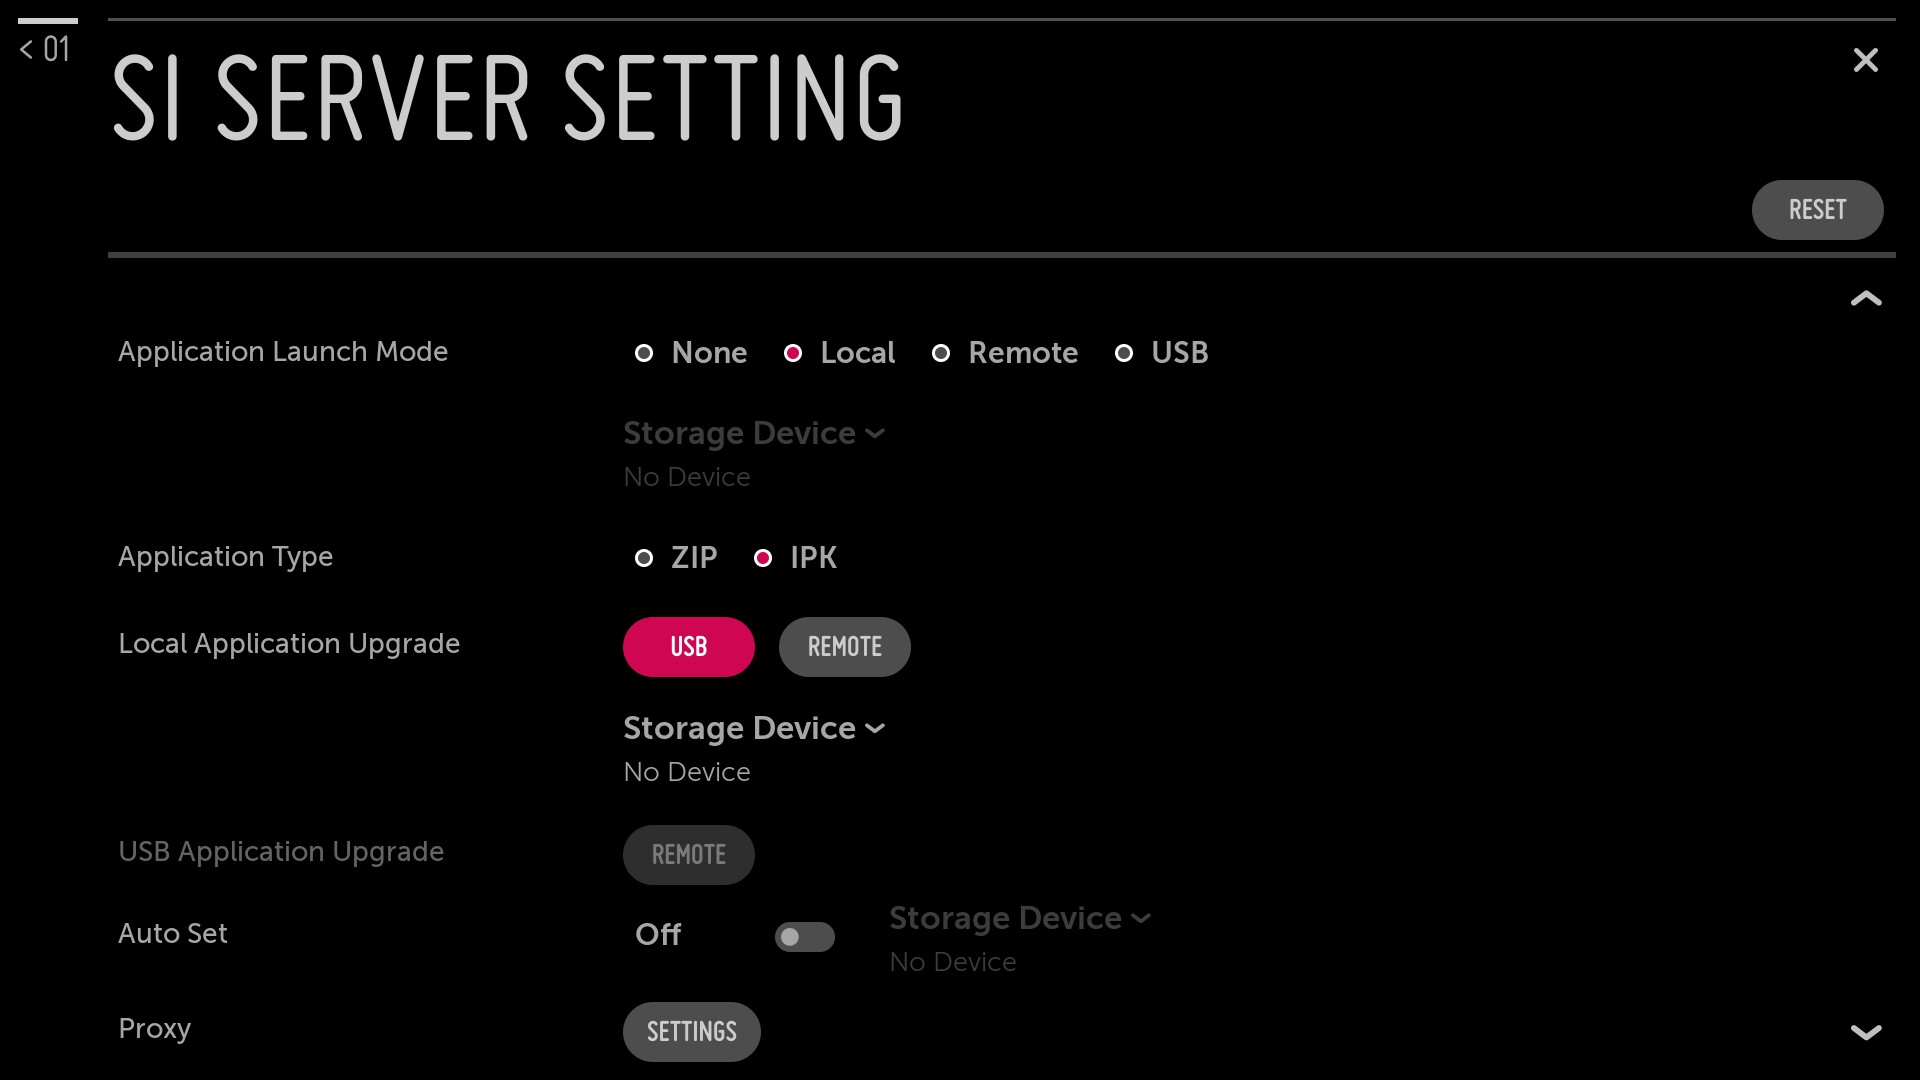
- Application Launch Mode: local
- Local Application type: IPK
- For the final step navigate to Local Application Upgrade and select USB. Press the OK button to confirm. In the top right corner, a pop-up displaying “Start Application Upgrade’ will show for a second.
- When this message disappears, TURN OFF the device using the remote. Then, after 10 seconds, TURN ON the device. The Digital Signage App will now install and launch.

Batch Installation from the cloud with settings from a USB drive:
Factory reset your screen/player if it has previous apps installed
Set time and date to “automatically”, and set the timezone
Download and copy the file “scap_installation.json” to the root directory of the USB drive
Plug the USB drive and restart your screen
The screen should restart, and install the app
You should see the Notification “START TO UPGRADE APPLICATION” the “COMPLETE.”
If the app does not start, remove the USB and restart the screen