This help page guides you through setting up digital signage on NovaStar LED displays. This method uses the NovaStar multimedia player’s built-in web page widget to load the digital signage web player (dsplayer.io) directly.
Once setup is complete, content is managed from your CMS dashboard. You do not need to reopen ViPlex Express for normal content updates.
How to Install Digital Signage on NovaStar LED Displays
To install Digital Signage player on NovaStar LED displays, you’ll need:
- A NovaStar multimedia player connected to your LED display
- Internet connection on the player (Ethernet, Wi-Fi, or 4G)
- ViPlex Express installed on a Windows PC
Supported NovaStar Hardware
NovaStar Taurus and TU series multimedia players are supported, including TB20 Plus, TB30, TB40, TB50, TB60, TU15 Pro, TU20 Pro, TU40 Pro, TU4K Pro, and similar models.
Standard NovaStar sending cards without a multimedia player are not supported.
Before you continue: for NovaStar player onboarding, connection, and screen discovery in ViPlex Express, follow NovaStar’s official setup documentation first.
Step 1: Create a playlist and add a Web Page widget
- Select your screen, then open the Playlist tab.
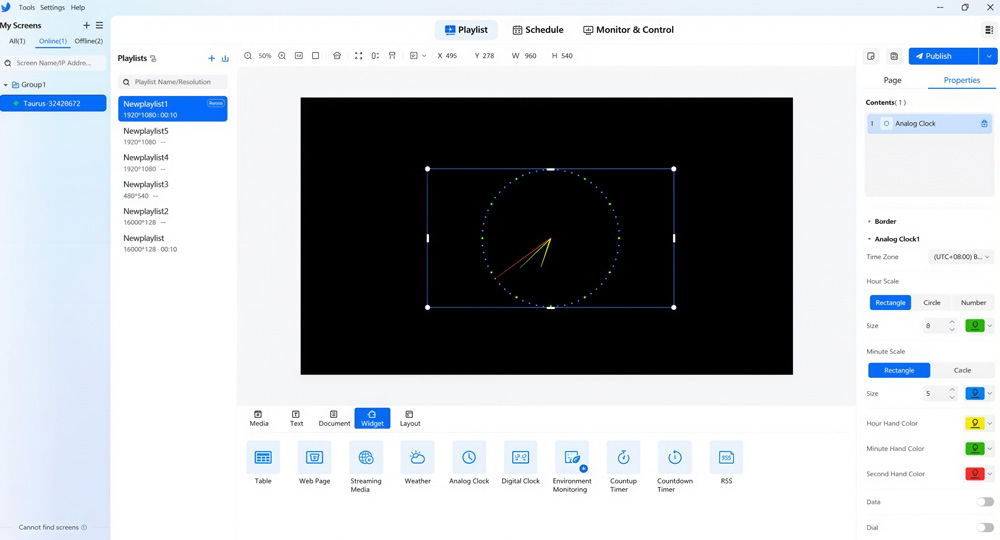
- Create a playlist and set the resolution to match your LED screen.
- Open Widget and add a Web Page widget.
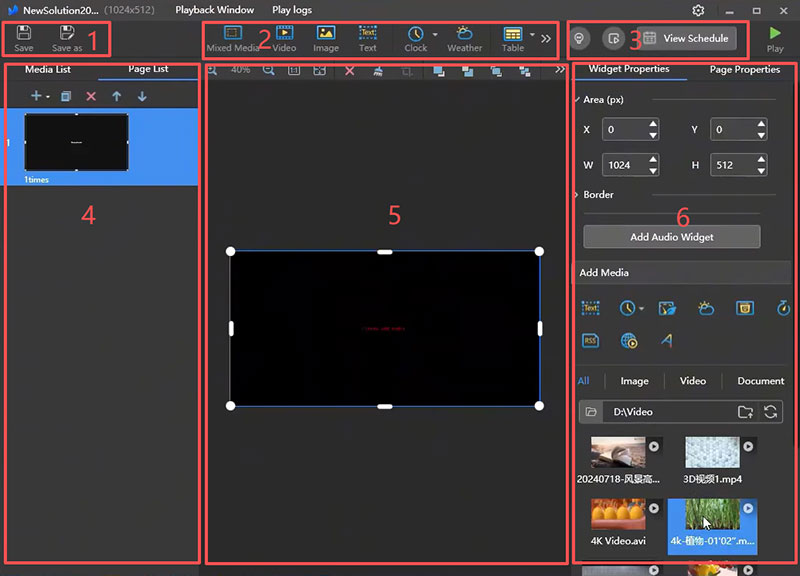
- Resize the widget to full screen.
- Set X=0 and Y=0, then set W/H to your full resolution.
- Enter the URL below in the web page properties:
https://dsplayer.io
- Set the web page playback duration to 1 hour or 2 hours to avoid continuous browser page refreshes.
You only need one web page in this ViPlex playlist. Your digital signage CMS handles playlist scheduling and rotation from the cloud.
Step 2: Publish to the screen
- Click Save and then Publish.
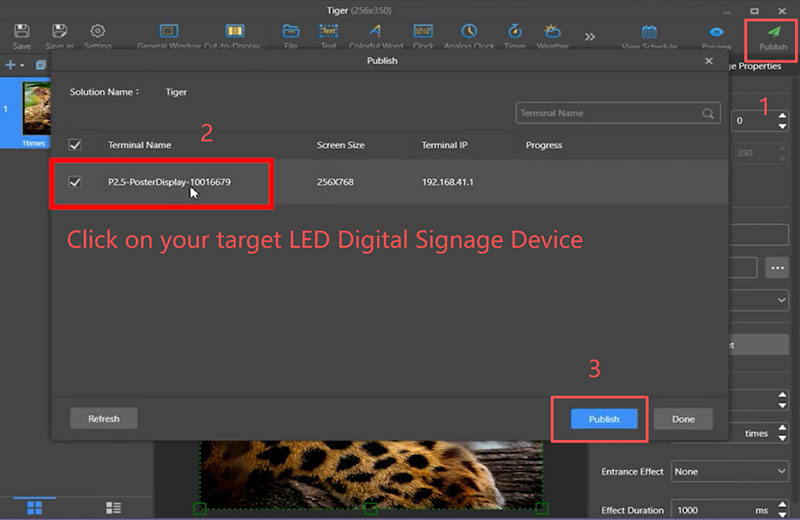
- Select your target screen and confirm publish.
- After publish, your LED screen should show a pairing code.
Step 3: Pair the screen with your digital signage account
- Go to your CMS and sign in.
- Go to Screens and click Add Screen.
- Enter the pairing code shown on your LED screen.
- Assign a playlist/schedule and start playback.
For more details: Add Screen to your account
Step 4: Persist the Player ID
This step ensures the NovaStar device keeps the Player ID permanently assigned. Some NovaStar devices may clear browser storage during reboot or firmware updates, which can disconnect the screen from your digital signage account.
Persisting the Player ID prevents this issue and keeps the device linked to your account.
- Go to your CMS and navigate to Screens.
- Click your recently paired NovaStar screen.
- Open Details.
Under Details, you will find the Device ID.

Copy the Device ID, then re-publish the Web Page URL from Step 1 using the following format:
https://dsplayer.io?id=XYZ
Replace XYZ with your actual Device ID.
After publishing the updated URL, the NovaStar device will continue using the same screen ID even if browser storage is cleared.
Troubleshooting
The web page does not load
- Verify internet connection in ViPlex Monitor & Control.
- Verify date/time/timezone (NTP).
- Confirm the URL is exactly
https://dsplayer.io.
The screen is blank or white
- Update player firmware and republish the playlist.
Pairing code does not appear
- Restart player, then republish.
ViPlex cannot find the player
- Follow NovaStar’s official connection and discovery guide for network pairing.
- Ensure PC and player are on the same network.
- Try player hotspot mode.
- Add by IP (
192.168.0.10) manually.
Content does not play after pairing
- Verify playlist is assigned to the screen in your CMS.
- Verify screen licence is active.
Tip:
After setup, use your digital signage CMS for content updates. ViPlex Express is only needed for initial web player deployment.