This guide offers clear instructions for installing Digital Signage on TCL commercial Android displays, configuring settings, and setting the digital signage app as the default playback application.
Supported TCL Digital Signage Models
- TMN series (Android 13)
- TBN series (Android 13)
- TEN series (Android 9)
How to Install Digital Signage on TCL Commercial Displays
Step 1: Get the APK file
Insert a USB drive into a computer
Download the latest APK from Download APK
Copy it to the main directory of your USB drive
Insert the USB drive into an available USB port on your TCL digital signage display
Step 2: Install the APK file
- On your remote control, press the Apps button
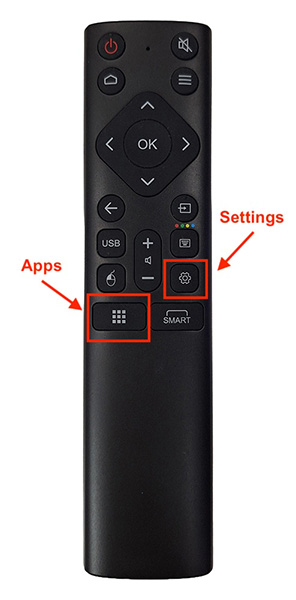
- Go to File Browser
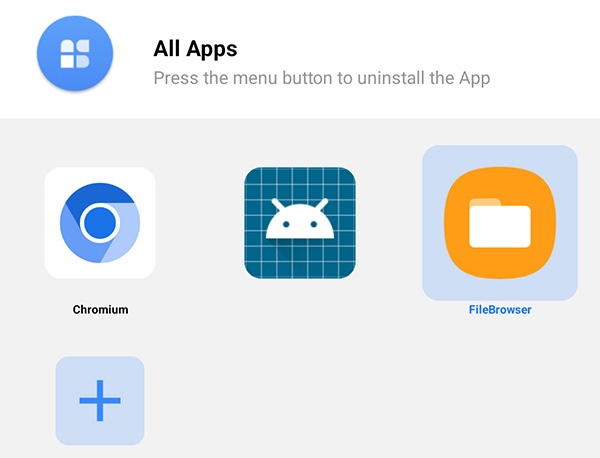
Click on the APK file
Choose Install
Wait for the installation process to complete, then click Done
Step 3: Set Digital Signage as the Home App (Primary CMS)
Press the Settings button on your remote control
Go to system –> customisation –> primary cms
Select the digital signage app to set it as the primary CMS for your TV
Step 4: Set the Timezone
Go to date and time
Make sure the date and time are correct.
Step 5: Configure Auto-Start
Auto start allows the digital signage software to launch automatically when the device powers on or restarts.
- Step 1:
(This step depends on your TV specs)
Go to Settings > Device Preferences > Quick Start > Toggle the Quick Start switch to the On position.
or:
Go to Settings > Apps > Special app access > Display over other apps > Ensure that the “Digital Signage App” is ON.
Step 2:
- Go to the “Safety Guard” app on your TV.
- Select “Permission shield”.
- Select “Auto launch permission”.
- First, toggle “Auto manager” to Closed.
- then, toggle “Digital Signage App” to Opened.
Step 3:
- Go to Settings > Device Preferences > Restart.
- After the TV powers back, the digital signage app should start automatically after a few seconds.
Step 6: Configure Power Management
To enable the power management feature:
With the digital signage app running, connect a keyboard to the display
Press ALT + M to open the hidden menu
Enter password: 1122
Press Open TV Settings
Navigate to Power Key Definition and set it to Sleep Now
Note: The power management feature is only available for Android rooted devices.
Step 7: Register Your Screen
Restart the display
The digital signage app will launch automatically and show a Screen ID
Go to the CMS, navigate to Screens, and click Add Screen
Enter the Screen ID to link the display to your account