This help page shows how to install Digital Signage on Sony BRAVIA professional displays using an APK copied to a USB drive.
Requirements
- Sony BRAVIA professional display
- Sony remote control
- USB drive formatted as FAT32
- Latest APK copied to the root of the USB drive
- Internet connection
Supported Models
Sony BRAVIA Professional Display range running Android with Pro Mode, which includes:
- BZ30L Series (43"–98")
- EZ20L Series (43"–85")
- BZ40H Series (55"–85")
- Legacy Android-based models such as the BZ35F and BZ30J Series are also supported for existing deployments.
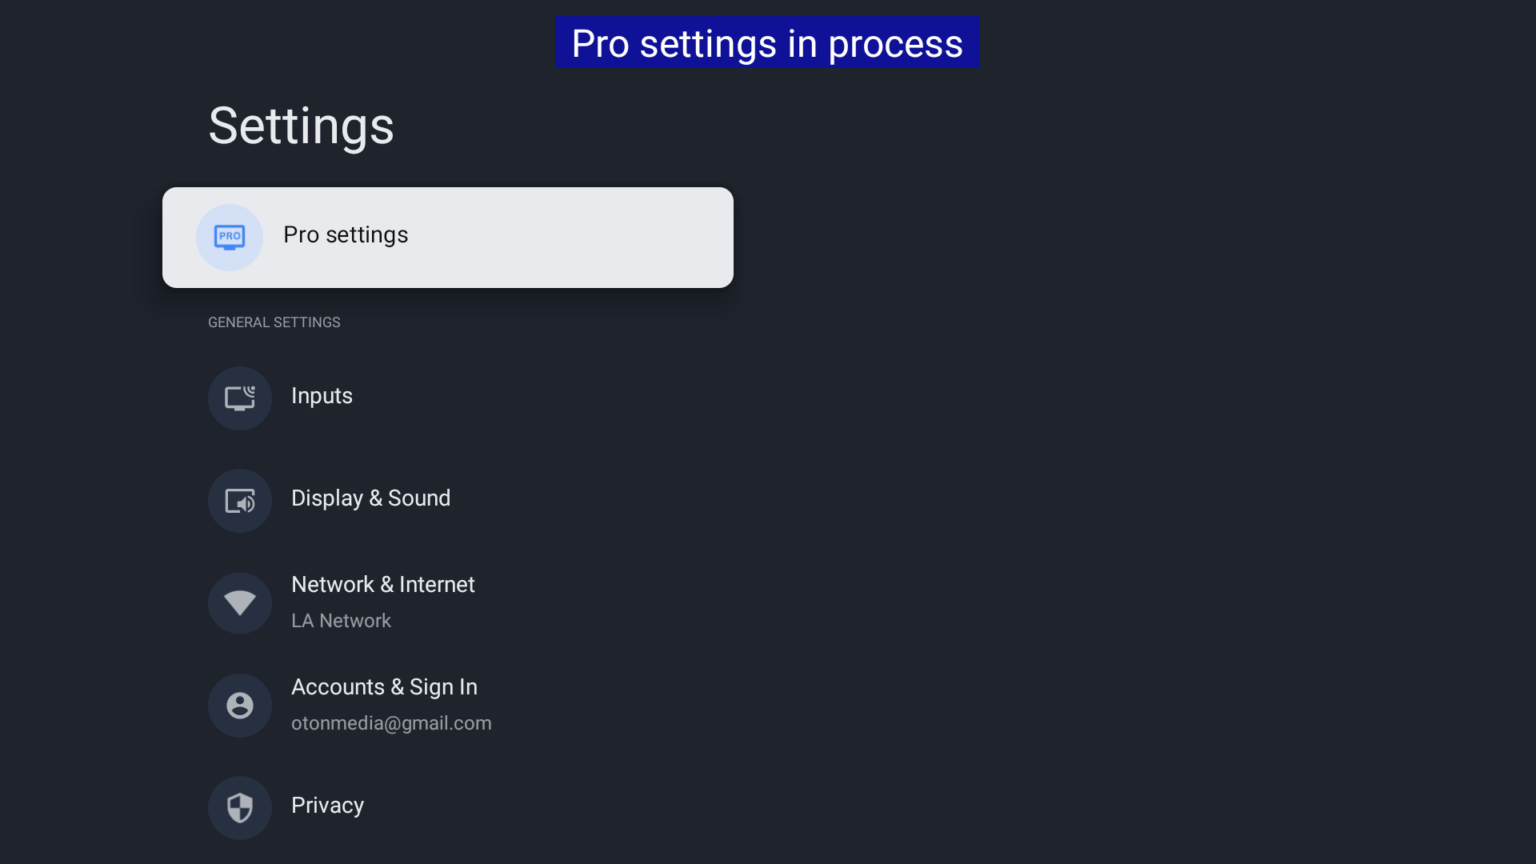
Enable Pro Settings
- Open the Sony Settings menu.
- Go to Pro Settings.

Install Digital Signage
Step 1 - Prepare the USB drive
- Download the latest APK from Download APK.
- Copy the APK file to the root of a USB drive formatted as FAT32.
Step 2 - Insert the USB drive
- Insert the USB drive into the USB port on the Sony display.
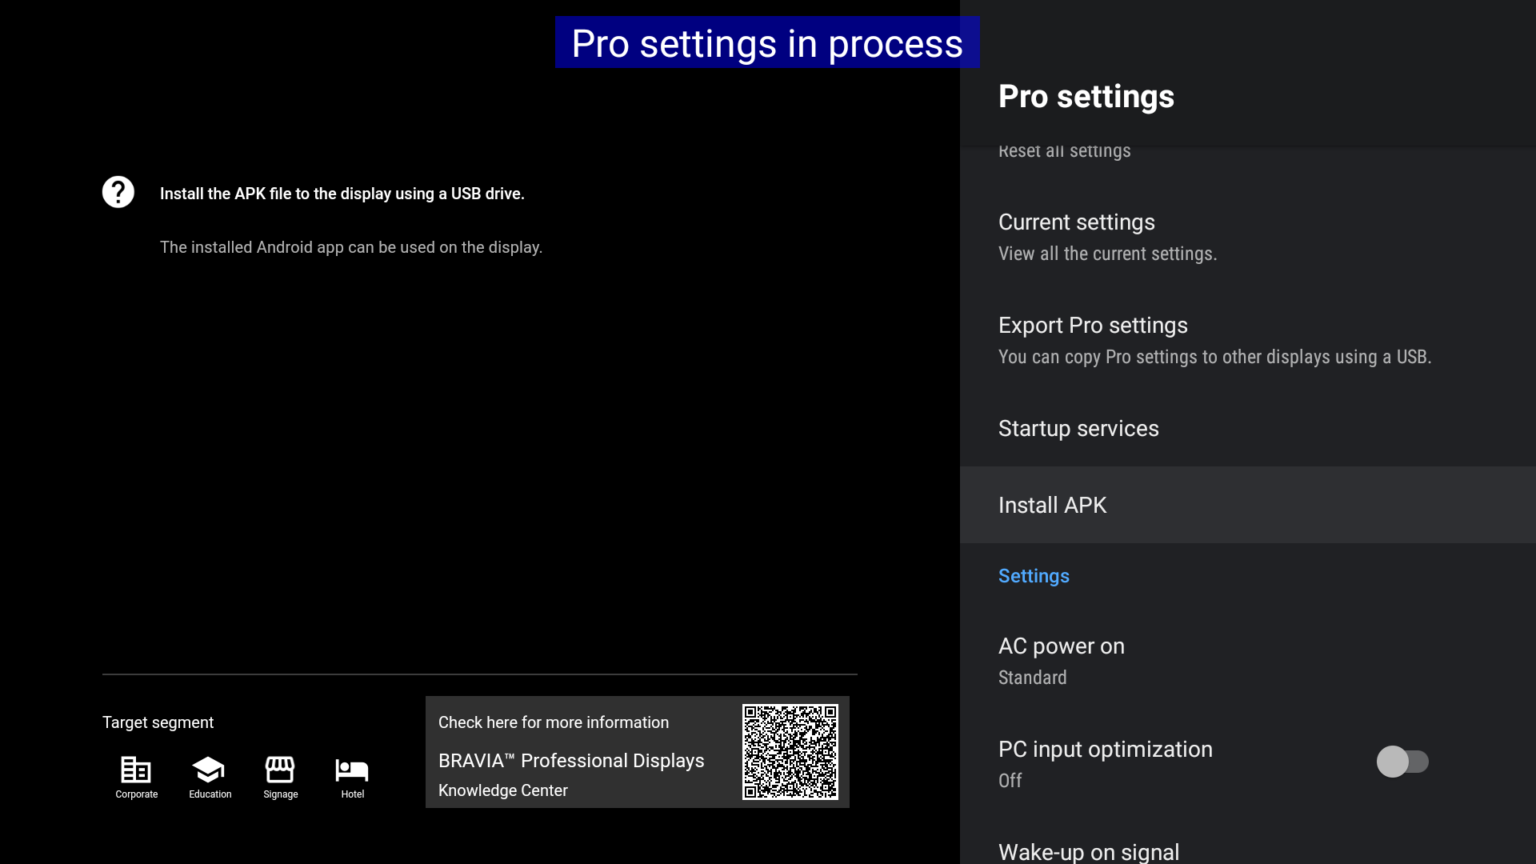
Step 3 - Install the APK
- In Pro Settings, select Install APK.
- Choose the APK file from the USB drive.
- Press Install and wait for the installation to finish.
Start Digital Signage App
- Open the digital signage app after installation.
- Wait for the screen hash ID to appear.
- Add the screen from your content management console.
Basic Pro Settings
Use these settings to make the digital signage app start cleanly in Sony’s Pro mode.
Step 1 - Open Pro Settings
- Press the HOME button on the remote.
- Open the Settings gear in the top right.
- Select Pro Settings.
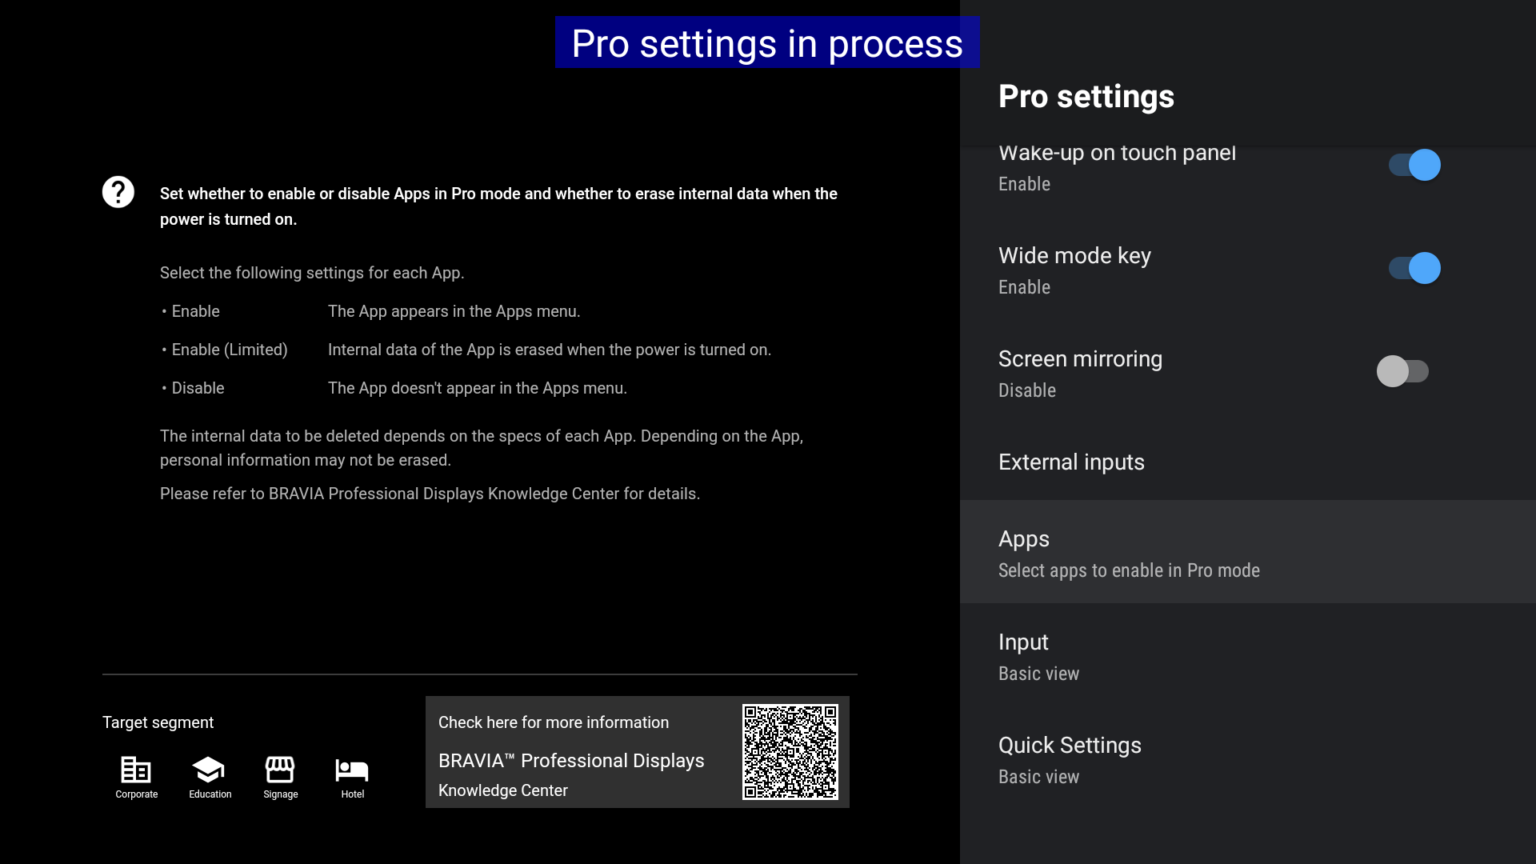
Step 2 - Enable Digital Signage
- Open Apps in Pro Settings.
- Find Digital Signage and select Enable.
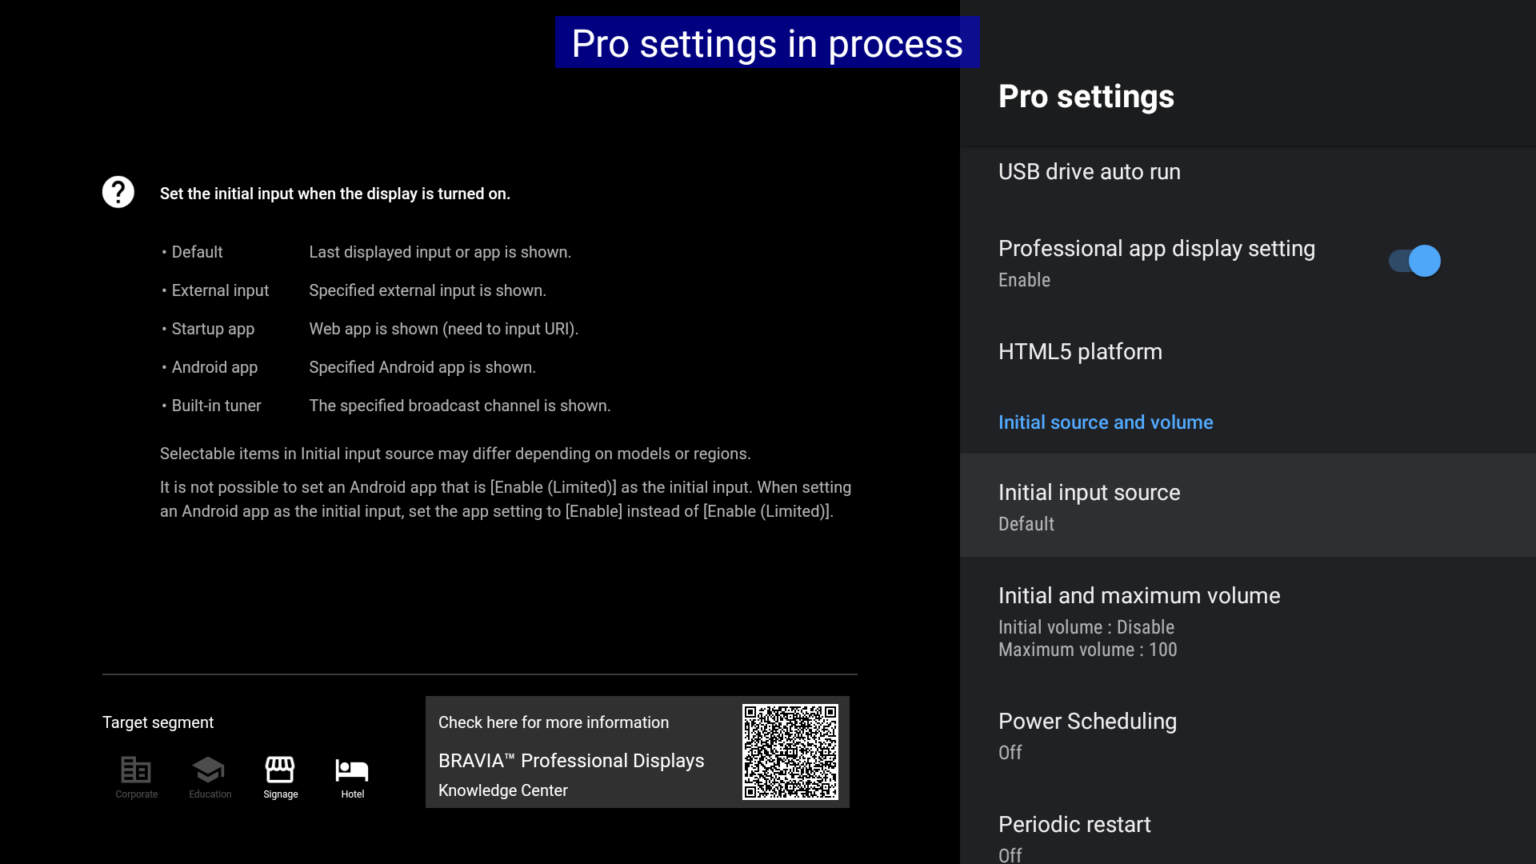
Step 3 - Set the input source
- Go back to Pro Settings.
- Open Initial Input Source.
- Select Android App.
- Choose Digital Signage from the list of installed apps.
Step 4 - Finish setup
- Confirm with OK.
- Select Start Pro Mode to reboot the display and apply the configuration.
Additional Settings
These settings help keep the display on and recover after power interruptions.
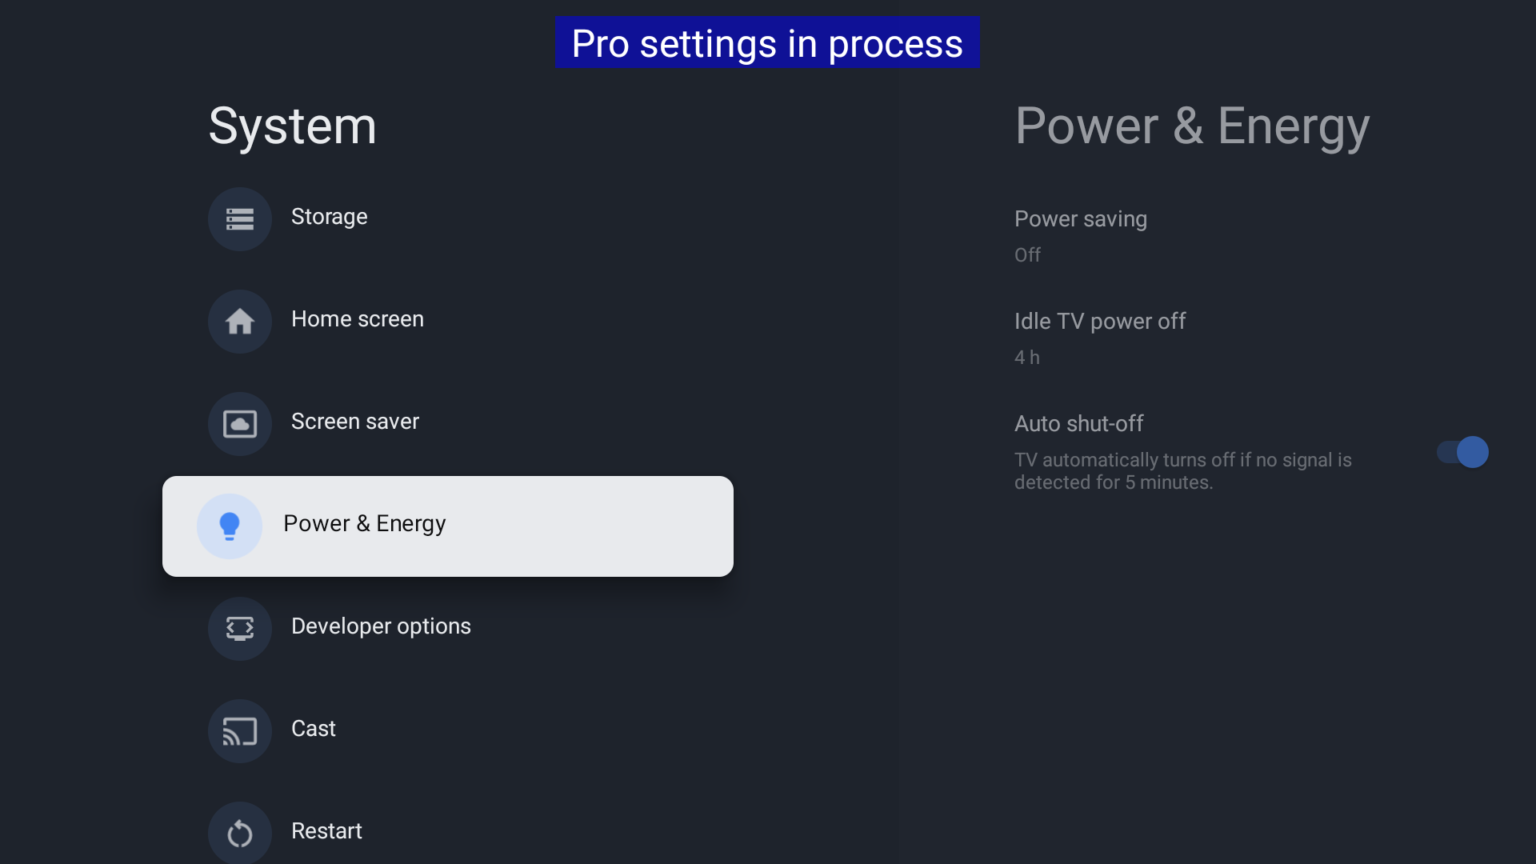
Disable power saving mode
- Press the HOME button on the remote.
- Open the Settings gear in the top right.
- Select Power & Energy.
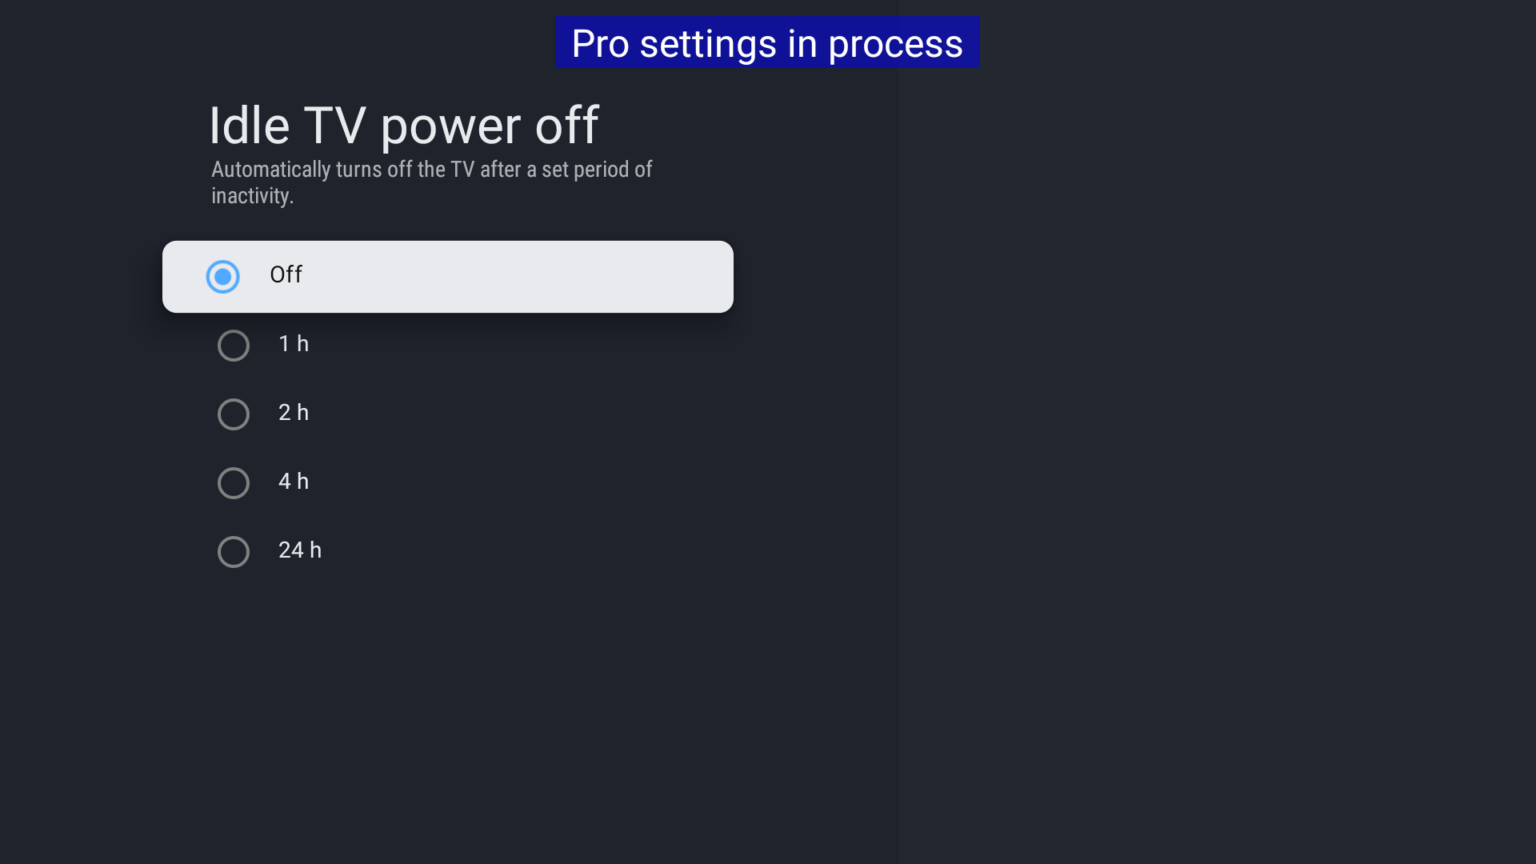
- Open Idle power off.
- Set it to Off.
Time controlled on and off
- Press the HOME button on the remote.
- Open the Settings gear in the top right.
- Select Pro Settings.
- Open Power Scheduling.
- Set the on and off times you want.
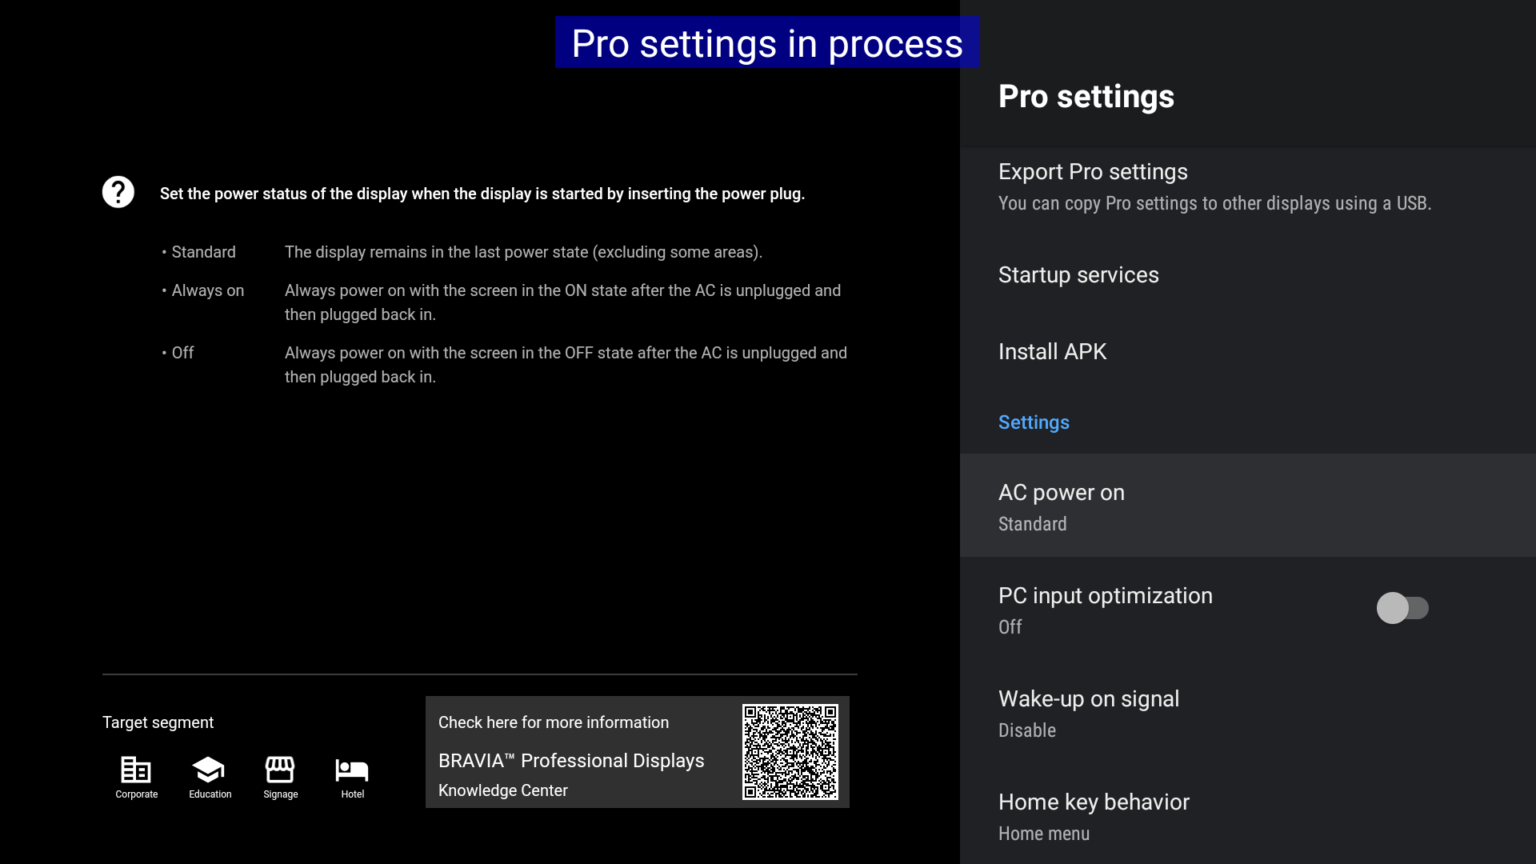
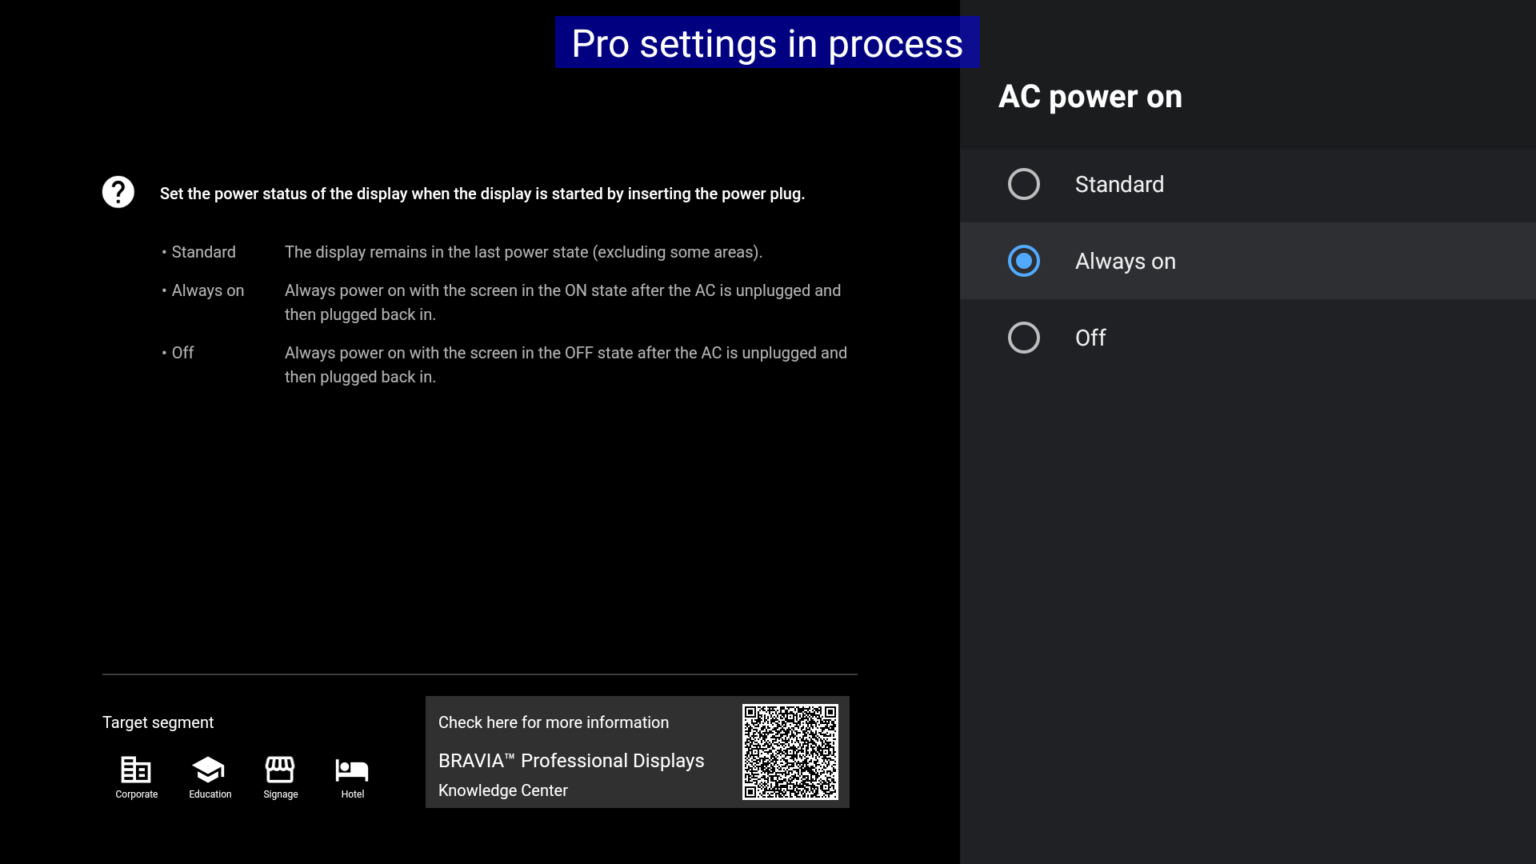
Autostart on power failure
- Press the HOME button on the remote.
- Open the Settings gear in the top right.
- Select Pro Settings.
- Open AC Power On.
- Set it to Always On.