How to Install Android APK on Your Digital Signage Device
Follow these steps to install the APK on your Android digital signage device:
Step 1: Download the APK
- Sign in to your digital signage portal.
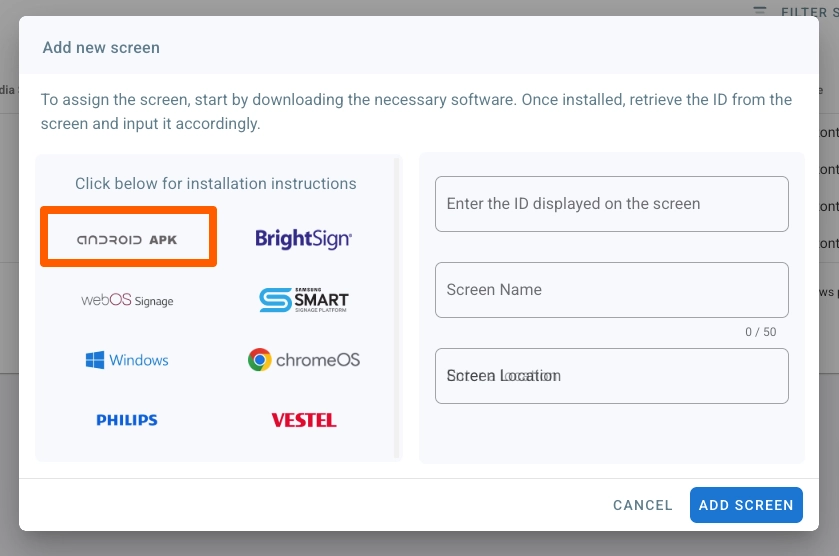
- Navigate to the Screens section.
- Click on Add Screen.
- Download the Android APK from the left banner as shown in the image below:

Step 2: Transfer the APK to a USB Flash Drive
- Copy the downloaded APK file to a USB flash drive.
- Ensure the USB flash drive is formatted correctly (e.g., FAT32 or NTFS) and the APK file is successfully transferred.
Step 3: Connect the USB Flash Drive to Your Android Device
- Insert the USB flash drive into the USB port of your Android digital signage device.
Step 4: Enable Installation from Unknown Sources
- On your Android device, navigate to Settings.
- Go to Security (or Privacy, depending on the device).
- Enable the option Install from Unknown Sources or Allow Unknown Apps.
- If prompted, confirm the security warning.
Step 5: Install the APK
- Open the File Manager on your Android device.
- Locate and select the APK file on the USB flash drive.
- Tap Install.
- Wait for the installation to complete.
Step 6: Launch the Application
- Once installed, open the app directly or locate it in your app list.
- Follow any on-screen instructions for initial setup.
Step 7: Assign the Device to Your Account
- After launching the application, a hash code will appear on the screen.
- Copy this hash code.
- Go back to your digital signage portal.
- Use the hash code to add the device to your account and complete the setup.